
Top 10 Gluten-Free and Dairy-Free Snack Ideas for Every Craving
When it comes to snacks, finding options that are both gluten-free and dairy-free can often feel like a challenge. Whether you’re managing food allergies, following a specific diet, or simply seeking healthier alternatives, you might think your snack choices are limited.
But the good news is, you don’t have to sacrifice flavor or satisfaction!
There is a wide variety of gluten-free and dairy-free snacks that not only meet your dietary needs but are also absolutely delicious. From crunchy and savory bites to sweet and satisfying treats, there’s something for every craving.
In this blog post, we’ll share top 10 gluten-free and dairy-free snack ideas that are perfect for every craving. These simple, wholesome snacks are ideal for anyone looking for easy-to-make, nutritious options that are as tasty as they are allergy-friendly.
Whether you’re looking for a quick bite, preparing lunch, or seeking a fun snack on-the-go, you’ll find something here to suit your needs and taste!
Let’s dive into these amazing snack ideas that are free from gluten and dairy but full of flavor!
Top 10 Gluten-Free and Dairy-Free Snacks You’ll Love
Crispy Sweet Potato Fries
Introduction:
Sweet potato fries are a popular and healthy alternative to traditional potato fries. When made correctly, they can be crispy on the outside while soft and fluffy on the inside, making them an irresistible snack or side dish. Not only are they gluten-free and dairy-free, but sweet potatoes are packed with essential nutrients like vitamin A, fiber, and antioxidants. Plus, they are naturally sweet, which pairs wonderfully with a variety of seasonings, giving you a satisfying, guilt-free treat.
Ingredients:
- 2 medium sweet potatoes, peeled and cut into fries
- 2 tablespoons olive oil
- 1 teaspoon paprika
- 1/2 teaspoon garlic powder
- 1/2 teaspoon onion powder (optional)
- Salt and pepper, to taste
- 1 tablespoon cornstarch (optional, for extra crispiness)
- Fresh parsley or cilantro for garnish (optional)
Instructions:
- Preheat the Oven: Begin by preheating your oven to 400°F (200°C). This ensures that the fries will bake evenly and become nice and crispy. Line a baking sheet with parchment paper to make cleanup easier and prevent the fries from sticking.
- Prepare the Sweet Potatoes: Wash and peel the sweet potatoes. Cut them into thin, even fries or wedges. The thinner the fries, the crispier they will get. Aim for about 1/4-inch thick slices, ensuring that they are all uniform in size so they cook evenly.
- Season the Fries: In a large bowl, toss the sweet potato fries with olive oil, ensuring each piece is coated. Add paprika, garlic powder, onion powder (if using), salt, and pepper, then toss again to distribute the seasonings evenly. If you want extra crispiness, add cornstarch to the mix, which helps absorb excess moisture and gives the fries a crunchy texture.
- Arrange the Fries: Spread the fries in a single layer on the baking sheet. Make sure the fries aren’t overcrowded; this will allow them to crisp up properly. If necessary, use two baking sheets to give each fry enough space.
- Bake to Perfection: Bake the fries for 25-30 minutes, flipping them halfway through to ensure they cook evenly. Keep an eye on them as the baking time approaches the 20-minute mark to avoid burning. The fries should be golden brown and crisp on the edges when done.
- Garnish and Serve: Once baked, remove the fries from the oven and garnish them with freshly chopped parsley or cilantro for a burst of color and flavor. Serve immediately with your favorite dipping sauce, such as ketchup, aioli, or a tangy dairy-free ranch.
Tips for the Perfect Crispy Fries:
- Soak the Fries: For an extra crispy texture, soak the sweet potato fries in water for at least 30 minutes before baking. This helps remove excess starch, resulting in crispier fries.
- Use a Wire Rack: If you have a wire rack, place it on top of the baking sheet to allow air circulation around the fries, ensuring they bake evenly and become extra crispy.
- Customize the Seasonings: Feel free to get creative with the seasonings! You can add chili powder, smoked paprika, cumin, or a sprinkle of cinnamon for a different twist.
Why You’ll Love These Fries: These crispy sweet potato fries are not only a healthier alternative to regular fries, but they are also a great snack for anyone on a gluten-free or dairy-free diet. The natural sweetness of the sweet potatoes, combined with savory seasonings, creates the perfect balance of flavors. Plus, they’re incredibly versatile and can be served alongside a main dish, in a salad, or as a satisfying snack to munch on.
Avocado and Rice Cake Snack
Introduction:
Avocado and rice cakes are a simple yet incredibly satisfying snack that’s both gluten-free and dairy-free. This snack offers a delightful combination of creamy, nutrient-packed avocado on top of a crunchy, light rice cake. It’s not only quick and easy to prepare but also full of healthy fats, fiber, and essential vitamins, making it an ideal choice for a mid-day snack or a light meal. Whether you’re craving something savory or want a quick snack that’s both filling and nutritious, avocado and rice cakes are a perfect option to satisfy your hunger.
Ingredients:
- 2 gluten-free rice cakes
- 1 ripe avocado
- 1 tablespoon lemon juice (optional)
- Salt and pepper, to taste
- Red pepper flakes (optional)
- Fresh cilantro or parsley for garnish (optional)
Instructions:
- Prepare the Avocado: Begin by cutting the avocado in half and removing the pit. Scoop the flesh into a small bowl and mash it with a fork until smooth or slightly chunky, depending on your preference. Add lemon juice to the mashed avocado to enhance its flavor and prevent it from browning too quickly. Season with salt and pepper to taste. If you prefer a little kick, you can add a pinch of red pepper flakes to the mix.
- Prepare the Rice Cakes: Take your gluten-free rice cakes and place them on a clean surface or a plate. Rice cakes are naturally crunchy, but you can lightly toast them for an added crispness if you like.
- Assemble the Snack: Evenly spread the mashed avocado on top of each rice cake. Be generous with the avocado; you want to cover the entire rice cake for a creamy and delicious bite with every mouthful.
- Garnish and Serve: For an extra burst of flavor, sprinkle red pepper flakes on top of the avocado spread. Garnish with freshly chopped cilantro or parsley for a touch of color and freshness. You can also drizzle a little bit of olive oil or balsamic glaze for added richness, but it’s totally optional.
- Enjoy: Serve the avocado-topped rice cakes immediately for the best texture. This snack is perfect on its own or as part of a larger meal. Pair it with a side of fruit or a handful of nuts to make it a more substantial snack.
Why You’ll Love This Snack:
- Quick and Easy: This snack is super simple to make, with minimal preparation required. It’s perfect for those busy days when you need something healthy and satisfying in no time.
- Packed with Nutrients: Avocados are rich in healthy fats, particularly monounsaturated fats, which are good for heart health. They also provide fiber, potassium, and a variety of vitamins, including vitamin E and vitamin K.
- Customizable: The beauty of this snack is how versatile it is. You can play around with different toppings to suit your taste. Try adding sliced tomatoes, cucumber, or a sprinkle of sesame seeds for extra texture and flavor.
- Gluten-Free and Dairy-Free: This recipe is ideal for anyone following a gluten-free or dairy-free diet, as it avoids common allergens while still delivering delicious flavors.
Variations to Try:
- Tomato & Basil Topping: Add thin slices of fresh tomato and a few leaves of basil to create an Italian-inspired version of the snack. Drizzle with balsamic vinegar for an extra touch.
- Spicy Avocado: Mix your mashed avocado with some sriracha sauce or chili flakes to create a spicy kick. Top with fresh jalapeños or a sprinkle of chili powder.
- Herb Infused: Add fresh herbs like dill, chives, or mint to your avocado for a refreshing twist.
Perfect for Any Time of Day: Whether it’s a light breakfast, a healthy lunch, or a quick afternoon snack, avocado and rice cakes provide a balanced mix of healthy fats, fiber, and carbohydrates. This easy snack will not only keep you full but also satisfy your cravings for something flavorful and nourishing.
Introduction:
Chickpea Salad Bites
Chickpea Salad Bites are the perfect combination of crunchy, savory, and satisfying, making them an ideal gluten-free and dairy-free snack. These bite-sized treats are packed with plant-based protein, fiber, and essential vitamins, making them not only delicious but also nutritious. Whether you’re hosting a party, looking for a light snack, or need something to take on the go, these chickpea salad bites are the perfect choice. They’re easy to prepare, customizable to your taste, and full of flavor, offering a refreshing twist on traditional salads. These bites are also incredibly versatile and can be served as appetizers, paired with a dipping sauce, or eaten as a quick snack when you’re craving something healthy and filling.
Ingredients:
- 1 can (15 oz) chickpeas, drained and rinsed
- 2 tablespoons olive oil
- 1 tablespoon lemon juice
- 1 teaspoon ground cumin
- 1/2 teaspoon garlic powder
- Salt and pepper, to taste
- 1/4 cup red onion, finely chopped
- 1/4 cup fresh parsley, chopped
- 1/4 cup cucumber, diced (optional)
- 1 tablespoon tahini (optional, for extra creaminess)
Instructions:
- Mash the Chickpeas: Start by draining and rinsing the chickpeas to remove any excess liquid. Place them in a large mixing bowl and use a fork or potato masher to mash them. Mash until the chickpeas are mostly broken down, but leave some texture for a chunky bite. You can also pulse them in a food processor for a smoother consistency, depending on your preference.
- Season the Mixture: Add the olive oil, lemon juice, ground cumin, garlic powder, salt, and pepper to the mashed chickpeas. Mix everything together until it’s well combined. The cumin will give the chickpea salad a warm, earthy flavor, while the lemon juice adds a refreshing zing.
- Add Fresh Vegetables: Stir in the finely chopped red onion, fresh parsley, and any other vegetables you’d like to include, such as cucumber, bell pepper, or even cherry tomatoes. The fresh ingredients will add crunch and color to the salad, making each bite even more enjoyable.
- Form the Bites: Use your hands or a spoon to scoop out small portions of the chickpea mixture. Roll each portion into a small ball or shape them into mini patties, depending on your preference. Aim for bite-sized pieces that are easy to grab and eat.
- Optional: Add Tahini for Creaminess: If you prefer a creamier texture, mix in a tablespoon of tahini. This adds a rich, nutty flavor and helps bind the ingredients together. You can also drizzle some tahini on top of the finished bites for an added touch of creaminess.
- Chill and Serve: Place the chickpea salad bites on a plate or tray and refrigerate for at least 30 minutes before serving. Chilling them helps the flavors meld together and makes the bites firmer, making them easier to handle. Serve them chilled as an appetizer, a snack, or alongside your favorite dipping sauce, like dairy-free yogurt or a tangy vinaigrette.
Why You’ll Love This Snack:
- Packed with Protein: Chickpeas are an excellent source of plant-based protein, making these salad bites filling and satisfying, while also supporting muscle growth and repair.
- High in Fiber: The fiber in chickpeas helps with digestion and keeps you feeling full longer, making these bites a great snack for any time of day.
- Customizable: These chickpea salad bites can be easily customized to suit your taste preferences. Add more spices for heat, throw in your favorite veggies, or use fresh herbs to change up the flavor. You can also dip them in your favorite gluten-free and dairy-free sauce for an extra kick.
- Perfect for Meal Prep: These bites are ideal for meal prep. They can be stored in the fridge for up to 3-4 days, making them a convenient snack to have on hand during the week.
Serving Suggestions:
- With a Side of Dipping Sauce: Serve these bites with a tangy tahini dressing, a lemony vinaigrette, or dairy-free ranch for a more indulgent snack.
- In a Salad: For a more substantial meal, add these bites to a fresh salad with mixed greens, cherry tomatoes, cucumbers, and a light dressing.
- With Fresh Veggies: Pair them with fresh vegetable sticks like carrot or cucumber for an extra crunchy side.
Why They’re Great for Any Occasion: Chickpea salad bites are perfect for a variety of occasions. They’re great for a quick snack at home, a healthy addition to a picnic, or even as an appetizer for a party. Since they’re both gluten-free and dairy-free, they cater to a variety of dietary needs, making them a versatile snack that everyone can enjoy.
Healthy and Quick Snack Ideas for Busy Days
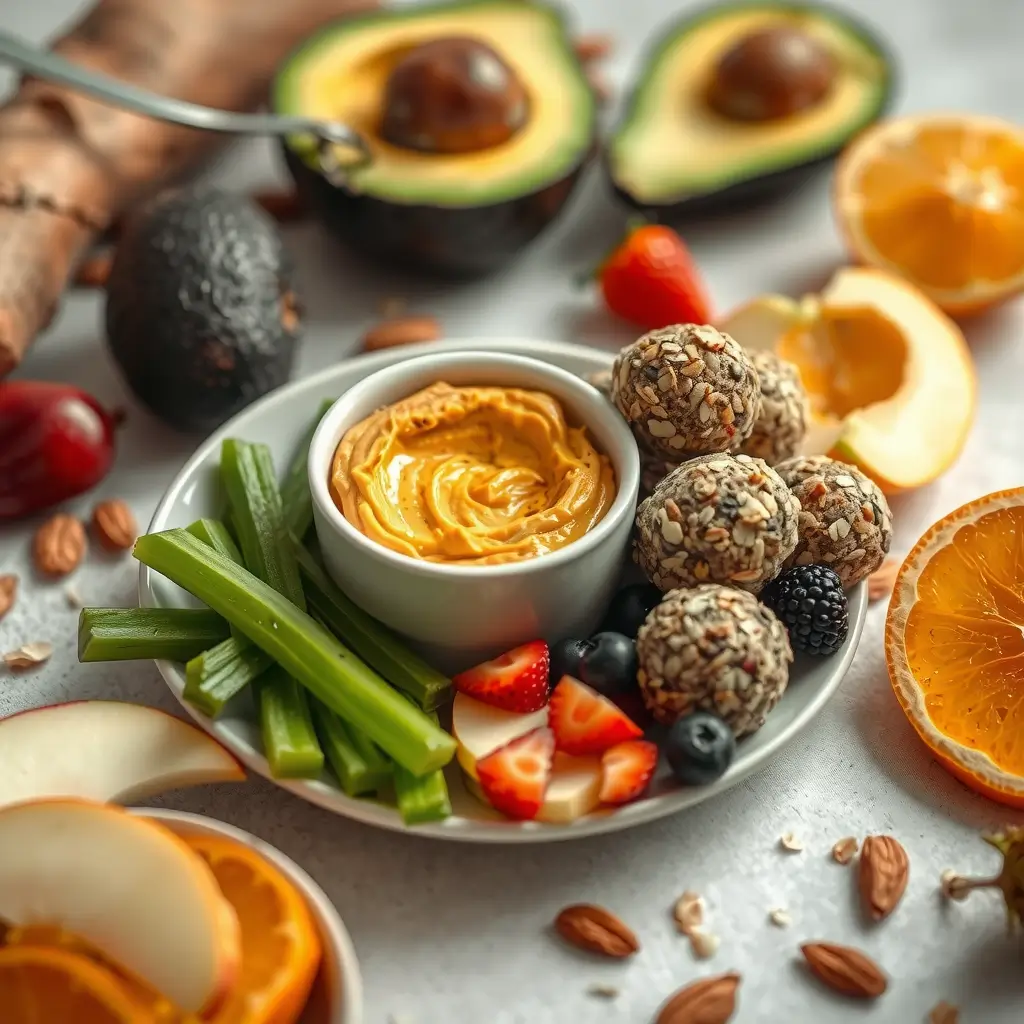
Fruit & Nut Energy Balls
Introduction:
Fruit and Nut Energy Balls are an easy, no-bake snack that’s packed with nutrients and natural sweetness. Perfect for anyone on the go, these bite-sized snacks provide a boost of energy and are incredibly versatile. Whether you’re looking for a quick breakfast, a post-workout snack, or a satisfying afternoon treat, these energy balls can be customized to fit your taste preferences. Made with wholesome ingredients like dried fruit, nuts, seeds, and a touch of natural sweetener, they are naturally gluten-free and dairy-free, offering a healthy and filling option that’s both nutritious and delicious. Plus, they’re incredibly easy to make and can be stored for days, making them an ideal snack for busy schedules.
Ingredients:
- 1 cup rolled oats (make sure they are gluten-free)
- 1/2 cup mixed nuts (almonds, walnuts, cashews, or your favorite choice)
- 1/4 cup dried fruit (raisins, cranberries, apricots, or dates)
- 2 tablespoons chia seeds or flaxseeds
- 2 tablespoons almond butter or peanut butter
- 2 tablespoons honey or maple syrup (for a vegan option)
- 1 teaspoon vanilla extract
- Pinch of salt
- Optional: 1/4 cup dark chocolate chips or cocoa nibs (for an extra touch of sweetness)
Instructions:
- Prepare the Dry Ingredients: In a food processor, combine the rolled oats, mixed nuts, and dried fruit. Pulse a few times until the nuts and dried fruit are broken down into small pieces, but still have some texture. The oats should also break down slightly, creating a more cohesive base for the energy balls.
- Add the Wet Ingredients: Add the almond butter (or peanut butter), honey (or maple syrup), vanilla extract, and a pinch of salt to the food processor. Pulse the mixture until it all starts to come together. If the mixture feels too dry, add a little bit more almond butter or a splash of water to help it bind together. The texture should be sticky enough to hold its shape when rolled into balls.
- Incorporate the Seeds and Optional Add-ins: Add the chia seeds or flaxseeds to the mixture and pulse a few more times to incorporate them. You can also add dark chocolate chips or cocoa nibs for a richer flavor, or other mix-ins like shredded coconut or protein powder for added nutrition.
- Form the Energy Balls: Scoop out a tablespoon of the mixture and roll it between your hands to form a ball. Continue rolling the rest of the mixture into balls, making about 12-15 balls, depending on the size you prefer. If the mixture is sticky, you can lightly wet your hands with water to make rolling easier.
- Chill and Serve: Place the energy balls on a tray lined with parchment paper and refrigerate them for at least 30 minutes. This will help them firm up and hold their shape. Once chilled, store the energy balls in an airtight container in the fridge for up to a week, or freeze them for longer storage.
Why You’ll Love These Energy Balls:
- Packed with Nutrients: These energy balls are filled with fiber, protein, healthy fats, and antioxidants. The oats provide long-lasting energy, while the nuts and seeds offer protein and healthy fats, helping to keep you satisfied for longer.
- Naturally Sweetened: The natural sweetness from dried fruit and a bit of honey or maple syrup makes these energy balls a guilt-free treat. Plus, the dried fruit adds fiber and a touch of natural sugar for a quick energy boost.
- Convenient & Portable: These energy balls are easy to carry and perfect for on-the-go snacking. Whether you’re heading to the gym, work, or school, you can pack a couple of these balls for a healthy snack whenever you need it.
- Customizable: The best part about these energy balls is how customizable they are. You can swap the nuts and dried fruits for your favorites, adjust the sweetness, or add extras like coconut flakes, protein powder, or even a sprinkle of cinnamon for flavor. They’re a flexible recipe that works with what you have on hand.
Health Benefits:
- Protein Boost: Nuts and seeds are excellent sources of protein, which is essential for muscle repair and keeping you full. This makes these energy balls great for post-workout recovery or as a filling snack.
- Omega-3 Fatty Acids: Chia seeds and flaxseeds are both rich in omega-3 fatty acids, which are important for brain health and reducing inflammation in the body.
- Gut Health: The fiber from the oats, dried fruit, and seeds helps support digestion and keeps your gut healthy, while also contributing to a feeling of fullness.
Serving Suggestions:
- As a Pre- or Post-Workout Snack: The combination of protein, healthy fats, and carbs in these energy balls makes them an excellent choice before or after exercise to fuel your body.
- With a Cup of Tea or Coffee: Enjoy these energy balls with a warm beverage for a satisfying snack that will keep you energized throughout the day.
- For Kids: These energy balls are a great snack for kids. They’re sweet enough to be enjoyed by little ones, yet packed with nutrients that are great for their growth and development.
Why They’re Perfect for Any Time of Day: Whether it’s first thing in the morning, as a midday snack, or an evening treat, these fruit and nut energy balls are perfect for any time of day. They’re quick to make, nutrient-dense, and provide a natural energy boost without the crash associated with sugary snacks. Plus, they’re customizable to fit any taste, making them a snack everyone can enjoy.
Apple Slices with Almond Butter
Introduction:
Apple slices with almond butter are a simple yet incredibly satisfying gluten-free and dairy-free snack. This easy-to-make treat combines the natural sweetness and crunch of fresh apples with the rich, creamy texture of almond butter. It’s a snack that offers a great balance of carbohydrates, healthy fats, and protein, making it both nourishing and energizing. Whether you’re looking for a quick snack to curb your hunger or something to fuel your body during the day, this snack is both wholesome and delicious. Plus, it’s perfect for those with dietary restrictions, offering a nutritious alternative to many processed snack foods.
Ingredients:
- 1 medium apple (any variety you prefer, such as Granny Smith, Gala, or Fuji)
- 2 tablespoons almond butter (smooth or chunky)
- A pinch of cinnamon (optional, for extra flavor)
- A drizzle of honey or maple syrup (optional, for extra sweetness)
- Chopped nuts, granola, or seeds for topping (optional)
Instructions:
- Prepare the Apple: Start by washing the apple thoroughly. Slice the apple into thin wedges or rings, depending on your preference. If you prefer a thicker slice, you can cut the apple into chunks for a more substantial snack. Removing the core is optional, but some people prefer to do so to make the slices easier to eat. The thin slices work especially well for dipping into almond butter.
- Spread the Almond Butter: Scoop about 2 tablespoons of almond butter and spread it generously over each apple slice. If you like a thinner spread, simply use less almond butter and spread it evenly across the slices.
- Optional: Add Toppings: To elevate the flavor and texture of your snack, sprinkle a pinch of cinnamon over the almond butter-coated apple slices. The spice adds a warm, aromatic flavor that complements the natural sweetness of the apple. If you have a sweet tooth, you can also drizzle a little honey or maple syrup on top for an extra touch of sweetness. For added crunch and nutrition, top the slices with chopped nuts, granola, or even some chia seeds.
- Serve and Enjoy: Arrange the almond butter-covered apple slices on a plate and serve immediately. This snack is perfect for a quick, healthy bite and can be eaten on the go or enjoyed at home with a cup of tea or coffee.
Why You’ll Love This Snack:
- Quick and Easy: This snack takes just minutes to prepare and requires minimal ingredients, making it perfect for busy days when you need something nutritious and satisfying.
- Balanced Snack: The natural sweetness of the apple, combined with the creamy almond butter, creates a perfect balance of carbohydrates, healthy fats, and protein. The apple provides fiber and natural sugar, while the almond butter adds healthy fats and protein to keep you feeling full longer.
- Customizable: You can easily customize this snack by using different nut butters like peanut butter, cashew butter, or sunflower seed butter. You can also add various toppings, such as a sprinkle of granola, dried fruit, or coconut flakes, to make it even more enjoyable.
- Great for All Ages: Apple slices with almond butter are not only a great snack for adults, but they’re also a hit with kids. The sweetness of the apples combined with the creamy texture of almond butter makes it a fun and healthy snack that children will love.
Health Benefits:
- Rich in Healthy Fats: Almond butter is an excellent source of monounsaturated fats, which are beneficial for heart health. These healthy fats also help improve cholesterol levels and promote overall wellness.
- High in Protein: Almond butter is packed with protein, which is essential for muscle repair and growth, as well as keeping you full between meals.
- Good for Digestion: Apples are a great source of dietary fiber, which supports digestive health and helps regulate blood sugar levels.
- Full of Antioxidants: Both apples and almond butter are rich in antioxidants, which help protect the body against oxidative stress and support overall immune function.
Serving Suggestions:
- For a Light Breakfast: Pair apple slices with almond butter as a quick and healthy breakfast. You can add a cup of herbal tea or a smoothie for a well-rounded start to your day.
- As an Afternoon Snack: When you’re feeling sluggish in the afternoon, apple slices with almond butter can provide a natural energy boost and curb your cravings.
- For Kids: These apple slices are a perfect snack for kids, providing essential nutrients in a fun and easy-to-eat form. You can even pack them for lunch or take them on a road trip.
Why It’s Perfect for Any Time of Day: Apple slices with almond butter are an ideal snack for any time of day. It’s a quick and easy option for breakfast, a mid-morning snack, or a healthy afternoon pick-me-up. This snack is not only nourishing but also incredibly versatile and customizable, making it a go-to choice when you want something light but satisfying. Whether you’re at home, at work, or on the go, this snack is the perfect way to fuel your body and enjoy a little sweetness without any added sugar.
Veggie Sticks with Hummus
Introduction:
Veggie sticks with hummus are a simple, vibrant, and incredibly satisfying snack that is not only gluten-free and dairy-free but also loaded with nutrients. This snack is a great way to enjoy a variety of fresh vegetables while getting a healthy dose of protein and healthy fats from the hummus. Veggie sticks offer a satisfying crunch and natural sweetness, while hummus provides a creamy, savory dip that complements the vegetables perfectly. Whether you’re looking for a light snack, a healthy appetizer, or something to serve at a gathering, veggie sticks with hummus are a versatile and delicious choice that everyone can enjoy. Plus, it’s easy to prepare and can be customized with a variety of vegetables and hummus flavors, making it perfect for all tastes.
Ingredients:
- 1 cucumber, sliced into sticks
- 2 medium carrots, peeled and cut into sticks
- 1 bell pepper, sliced into strips (any color)
- 1 celery stalk, cut into sticks
- 1/2 cup cherry tomatoes (optional, for a burst of color)
- 1/4 cup olives (optional, for an extra flavor kick)
- 1 cup homemade or store-bought hummus (plain, garlic, or flavored varieties)
- A pinch of paprika or cumin (optional, for garnish)
- Fresh parsley or cilantro for garnish (optional)
Instructions:
- Prepare the Veggies: Wash and peel the vegetables as needed. Slice the cucumber into thin sticks, cut the carrots into long, slender pieces, and slice the bell pepper into strips. For the celery, cut it into uniform sticks. If using cherry tomatoes, simply halve them to make them easier to dip. You can also add olives to the platter for extra flavor and variety.
- Arrange the Veggies: Arrange the veggie sticks on a serving platter or large plate in a colorful and appealing way. Grouping the vegetables by type can make them easier for guests to pick up, or you can scatter them randomly for a more casual, visually interesting presentation. Don’t forget to add a few cherry tomatoes and olives to brighten up the platter and add more variety.
- Prepare the Hummus: If you’re using store-bought hummus, simply scoop it into a small bowl. If you’re making homemade hummus, blend together chickpeas, tahini, lemon juice, garlic, olive oil, and a pinch of salt in a food processor until smooth and creamy. For a simple variation, you can add roasted red pepper, spinach, or herbs to the hummus to customize the flavor. You can even sprinkle a pinch of paprika or cumin on top for added flavor and a pop of color.
- Serve and Enjoy: Place the hummus in the center of the platter, surrounded by the veggie sticks. Serve immediately as a healthy, crunchy snack. If you prefer to prep ahead, you can store the veggie sticks and hummus separately in airtight containers in the fridge for up to 2-3 days, making this a perfect option for meal prep.
Why You’ll Love This Snack:
- Simple and Quick: Veggie sticks with hummus require minimal prep and can be put together in under 10 minutes, making it a quick and healthy snack for busy days. It’s perfect when you need something fresh and light.
- Packed with Nutrients: Veggies like carrots, cucumbers, and bell peppers are rich in vitamins and minerals, including vitamin A, vitamin C, and potassium. Hummus adds a dose of plant-based protein, fiber, and healthy fats, making it a filling and satisfying snack.
- Customizable: You can easily switch up the veggies and hummus flavors to keep things interesting. For example, add some crunchy radishes, jicama, or snap peas to the mix, or try different hummus varieties, such as roasted garlic, lemon-tahini, or spicy harissa hummus.
- Great for Any Occasion: Whether you’re hosting a gathering, meal prepping, or just need a light snack, veggie sticks with hummus are a versatile choice. They’re perfect for parties, picnics, or as a lunchbox snack for kids and adults alike.
Health Benefits:
- Rich in Fiber: The veggies in this snack, particularly carrots and bell peppers, are excellent sources of dietary fiber, which aids digestion and helps maintain steady blood sugar levels. Fiber also promotes feelings of fullness and satiety, making this snack an excellent choice to curb cravings.
- Full of Antioxidants: Vegetables like bell peppers and carrots are high in antioxidants, which help protect the body from oxidative stress and support immune function. The olive oil in hummus is also rich in antioxidants, which support heart health and reduce inflammation.
- Good for Digestion: Hummus, made from chickpeas and tahini, is a great source of protein and fiber, which are both beneficial for gut health. The fiber content helps regulate digestion and keeps things moving smoothly.
- Promotes Healthy Skin: The combination of veggies, hummus, and healthy fats provides a boost of nutrients that support healthy skin. Vitamins A and C, found in vegetables like carrots and bell peppers, promote skin health and can help with the repair of skin tissue.
Serving Suggestions:
- For a Party or Gathering: Veggie sticks with hummus are a great addition to any party spread or gathering. They can be served alongside other appetizers such as gluten-free crackers, stuffed mushrooms, or roasted nuts.
- As Part of a Balanced Lunch: Pair your veggie sticks with hummus alongside a light salad or a gluten-free wrap for a more substantial meal. This combination provides plenty of fiber, protein, and healthy fats to keep you energized throughout the day.
- With a Side of Fruit: For a refreshing twist, pair your veggie sticks and hummus with fresh fruit like apple slices, grapes, or berries for a sweet and savory contrast.
Why It’s Perfect for Any Time of Day: Veggie sticks with hummus are ideal for a mid-morning snack, an afternoon pick-me-up, or even as a light evening appetizer. They provide a healthy balance of fresh veggies and creamy hummus, making it a guilt-free, satisfying option at any time of the day. Whether you need a quick snack or something to share at a social gathering, this easy recipe is versatile, nutritious, and always a crowd-pleaser.
Satisfy Your Cravings with Sweet and Savory Treats
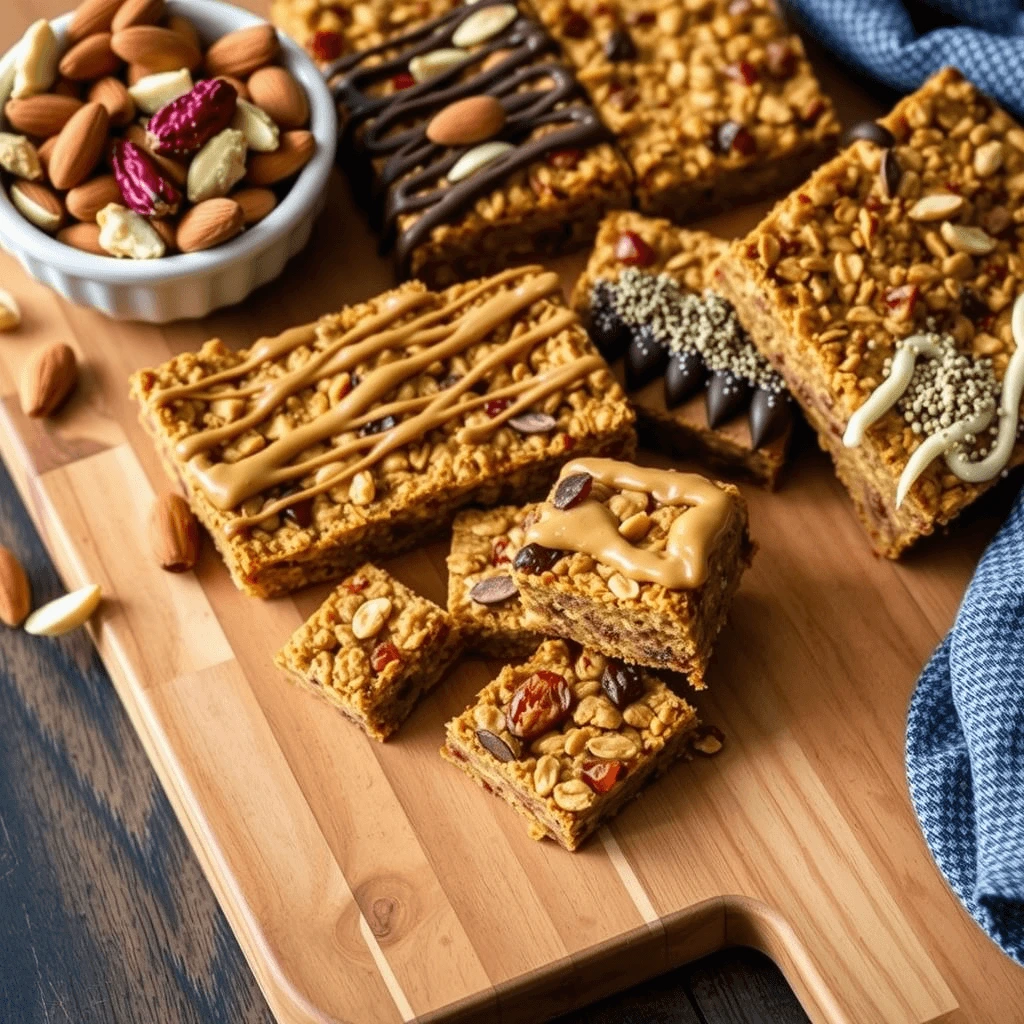
No-Bake Granola Bars
Introduction:
No-bake granola bars are the perfect solution when you’re craving something sweet and filling, but don’t have the time (or the oven) to bake. These bars are incredibly easy to make, requiring just a few simple ingredients, and they can be customized to suit your taste. Whether you’re looking for a quick snack on-the-go, a post-workout boost, or a healthy treat to curb your sweet tooth, these no-bake granola bars are the answer. They’re packed with whole grains, healthy fats, protein, and natural sweetness, providing a nourishing and satisfying option that’s gluten-free and dairy-free. Plus, they’re easy to store and can be made ahead of time for a grab-and-go snack throughout the week.
Ingredients:
- 2 cups gluten-free rolled oats
- 1/2 cup almond butter or peanut butter (make sure it’s smooth)
- 1/4 cup honey or maple syrup (for a vegan option)
- 1/4 cup chia seeds or flaxseeds
- 1/4 cup unsweetened dried fruit (raisins, cranberries, or chopped apricots)
- 1/4 cup nuts (almonds, walnuts, cashews, or your favorite variety)
- 1/4 cup dairy-free chocolate chips (optional)
- 1/2 teaspoon vanilla extract
- Pinch of salt
Instructions:
- Prepare the Dry Ingredients: In a large mixing bowl, combine the gluten-free rolled oats, chia seeds (or flaxseeds), dried fruit, and chopped nuts. Mix everything together to ensure it’s evenly distributed. The oats provide a good source of fiber and slow-releasing energy, while the dried fruit and nuts add sweetness and crunch to the bars.
- Mix the Wet Ingredients: In a separate bowl, combine the almond butter (or peanut butter), honey (or maple syrup), vanilla extract, and a pinch of salt. Stir everything together until it forms a smooth, sticky mixture. The nut butter acts as the binding agent, holding the bars together, while the honey or maple syrup adds sweetness and helps with the texture.
- Combine Wet and Dry Ingredients: Pour the wet mixture over the dry ingredients in the mixing bowl. Use a spatula or your hands to mix everything together thoroughly, making sure the oats, nuts, and dried fruit are well-coated with the almond butter mixture. The consistency should be sticky and firm enough to hold together when pressed.
- Press into a Pan: Line a small baking pan (an 8×8-inch pan works well) with parchment paper or lightly grease it. Transfer the mixture into the pan and press it down firmly with a spatula to compact the bars. This ensures the bars hold together once they set. If you prefer thicker bars, you can press them into a smaller pan; for thinner bars, use a larger pan.
- Chill and Set: Place the pan in the refrigerator for at least 2 hours to allow the granola bars to set. This will make them firm and easy to slice. If you’re in a hurry, you can even place the pan in the freezer for 30 minutes for quicker results.
- Slice and Serve: Once the bars have set, remove the pan from the refrigerator and cut the granola into squares or rectangles, depending on your preferred serving size. Store the bars in an airtight container at room temperature for up to a week, or refrigerate them for longer shelf life.
Why You’ll Love These No-Bake Granola Bars:
- Easy to Make: These granola bars require no baking and very little prep time. You can whip them up in just 15 minutes and then let them chill while you go about your day.
- Customizable: The beauty of no-bake granola bars lies in their flexibility. You can adjust the ingredients to suit your taste or dietary preferences. Add-ins like coconut flakes, pumpkin seeds, or cocoa nibs can give your bars a personal twist. You can also swap the nut butter for sunflower seed butter for a nut-free version, or use maple syrup instead of honey to make them vegan.
- Packed with Nutrients: These bars are a great source of fiber, healthy fats, and plant-based protein. Oats provide long-lasting energy, nuts offer healthy fats for heart health, and chia seeds or flaxseeds add omega-3 fatty acids for brain function.
- Portable and Convenient: No-bake granola bars are perfect for busy days when you need a quick, filling snack. They are portable and easy to pack in a lunchbox, gym bag, or even your purse for a snack on the go. They’re a great alternative to store-bought bars that may contain hidden sugars or artificial ingredients.
Health Benefits:
- High in Fiber: The oats and chia seeds in these bars are rich in soluble fiber, which helps with digestion, keeps blood sugar levels steady, and promotes a feeling of fullness.
- Protein-Packed: Nuts and seeds are high in protein, which helps with muscle recovery and provides energy. This makes these granola bars a perfect post-workout snack or a quick breakfast on busy mornings.
- Good for Heart Health: Almond butter, flaxseeds, and chia seeds are all sources of heart-healthy fats, including omega-3 fatty acids. These fats help reduce inflammation and support overall cardiovascular health.
- Antioxidant-Rich: Dried fruits like cranberries and raisins, as well as the nuts, provide antioxidants, which help protect the body from oxidative stress and support a healthy immune system.
Serving Suggestions:
- For Breakfast: Enjoy a granola bar alongside a cup of dairy-free yogurt or a smoothie for a balanced breakfast. The combination of fiber, protein, and healthy fats will keep you feeling full and energized throughout the morning.
- As a Post-Workout Snack: These bars are great for refueling after a workout, providing a mix of carbohydrates, protein, and healthy fats to aid muscle recovery and restore energy.
- As an On-the-Go Snack: Pack these bars for a quick snack between meals or as a filling treat when you’re traveling or running errands. They’re easy to carry and don’t require refrigeration, making them perfect for busy lifestyles.
Why They’re Perfect for Any Time of Day: No-bake granola bars are a versatile snack that can be enjoyed at any time of day. Whether it’s for a quick breakfast, a pre- or post-workout snack, or an afternoon pick-me-up, these granola bars will give you the energy and nutrients you need to keep going. They’re a much healthier alternative to processed granola bars and are easily adaptable to your tastes and dietary needs.
Banana Chips
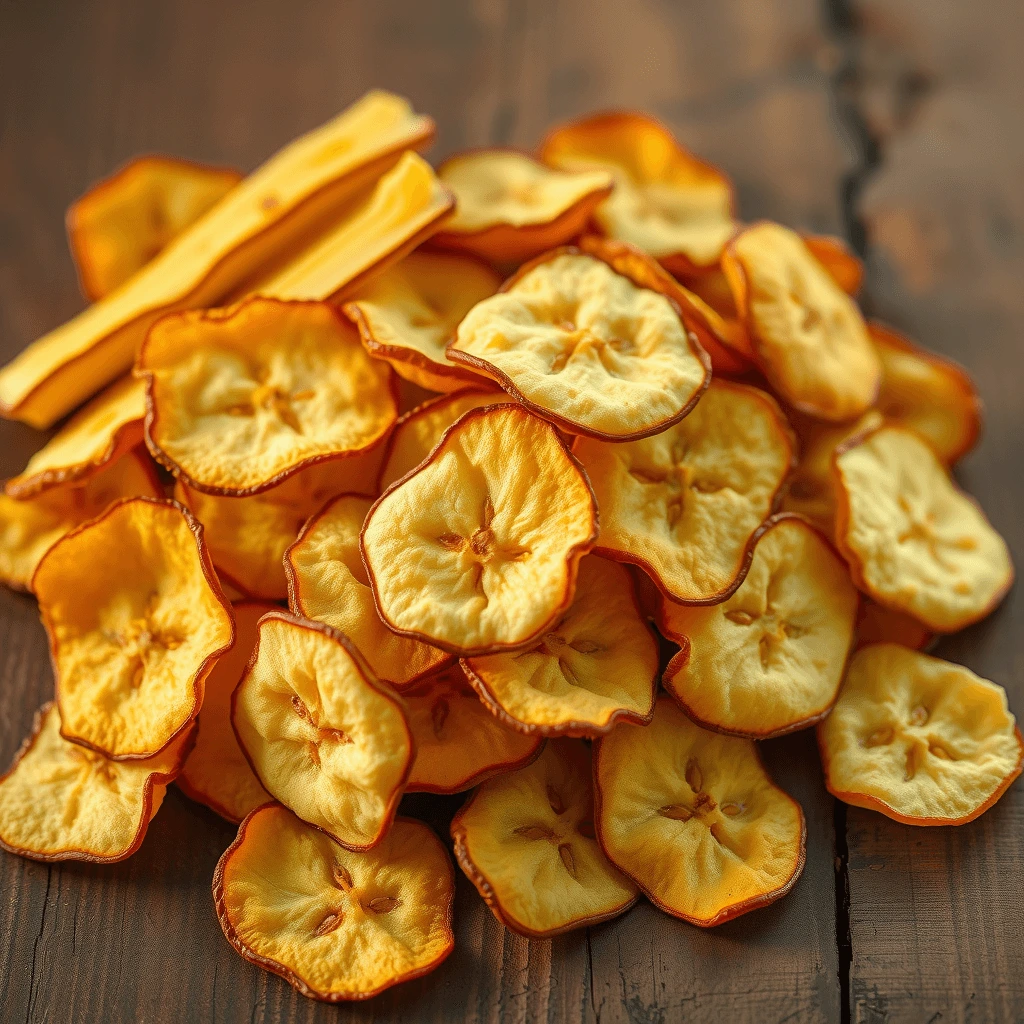
Introduction:
Banana chips are a crunchy, naturally sweet snack that’s both gluten-free and dairy-free. Made from ripe bananas, these chips are sliced thin and either baked or fried to create a crispy texture. While store-bought banana chips can sometimes be high in added sugars and oils, making them less healthy, making your own homemade banana chips allows you to control the ingredients, keeping them as healthy and simple as possible. This snack is not only delicious but also full of essential nutrients like potassium, fiber, and antioxidants, making it a guilt-free alternative to traditional chips or sugary snacks. Whether you’re craving a crunchy snack, looking for a healthy addition to your trail mix, or wanting a fun snack for the kids, banana chips are a great option that’s easy to prepare and perfect for any occasion.
Ingredients:
- 2 ripe bananas (choose ones that are just ripe, not overly soft)
- 1-2 teaspoons lemon juice (optional, to prevent browning)
- 1 tablespoon coconut oil or olive oil (optional, for baking)
- A pinch of salt (optional)
- Ground cinnamon or a drizzle of honey (optional, for extra flavor)
Instructions:
- Prepare the Bananas: Begin by peeling the bananas and slicing them into thin rounds, about 1/8 inch thick. The thinner the slices, the crunchier the banana chips will be. If you prefer larger chips, you can cut the bananas into thicker slices, but keep in mind that thicker slices may take longer to cook and may not become as crisp.
- Optional: Prevent Browning: To prevent the banana slices from browning during the drying process, you can lightly coat them with lemon juice. This helps preserve their color and gives them a slight citrusy tang. Simply sprinkle the lemon juice over the slices and toss them gently to coat.
- Choose Your Cooking Method: There are two main methods for making banana chips: baking or frying. Here’s how to do both:
- Baking Method: Preheat your oven to 200°F (93°C). Line a baking sheet with parchment paper or a silicone baking mat to prevent sticking. Arrange the banana slices in a single layer, making sure they don’t overlap. Lightly brush the slices with coconut oil or olive oil for added crispness, or leave them plain if you prefer a lower-fat option. Bake for 1.5 to 2 hours, flipping the slices halfway through the cooking time to ensure even crisping. Keep an eye on them towards the end to make sure they don’t burn. The banana chips will become crisp and golden.
- Frying Method: Heat a pan of oil (such as coconut oil or vegetable oil) over medium heat. Once the oil is hot, carefully add the banana slices in batches. Fry them for about 2-3 minutes per side until they become golden brown and crispy. Use a slotted spoon to remove them from the oil and place them on a paper towel to drain excess oil. Sprinkle a pinch of salt over the chips while they’re still hot for added flavor.
- Cool and Store: After the banana chips have finished baking or frying, let them cool completely on a wire rack. This allows them to firm up and become extra crunchy. Once cooled, you can store them in an airtight container at room temperature for up to a week. For longer storage, place them in a resealable bag and freeze them to keep them fresh.
Why You’ll Love These Banana Chips:
- Healthy and Guilt-Free: When you make your own banana chips at home, you can control the amount of oil and sugar used, ensuring that they’re a healthier snack option. You can bake them without oil or sweeteners for a clean, natural snack or add a small amount of coconut oil for a richer flavor.
- Naturally Sweet: Banana chips are naturally sweet without the need for added sugars. The natural sugars in bananas caramelize during the baking or frying process, creating a rich, satisfying sweetness that makes them the perfect snack for when you’re craving something sweet but want to avoid refined sugars.
- Perfect for Snacking or Sharing: These chips are great for snacking on their own or can be added to a trail mix, yogurt parfait, or fruit salad for extra crunch and flavor. They’re also an easy-to-make snack to share at gatherings, parties, or picnics.
- Gluten-Free and Dairy-Free: This snack is naturally gluten-free and dairy-free, making it a great option for anyone with dietary restrictions. It’s also suitable for vegans and those avoiding added preservatives or artificial ingredients found in many packaged snacks.
Health Benefits:
- Rich in Potassium: Bananas are well known for being a great source of potassium, an essential mineral that supports heart health, muscle function, and proper hydration.
- High in Fiber: Bananas are also a good source of dietary fiber, which promotes healthy digestion and helps keep you feeling full and satisfied. The fiber in bananas also helps regulate blood sugar levels, making them an excellent choice for those managing blood sugar.
- Packed with Antioxidants: Bananas contain a variety of antioxidants, including dopamine and catechins, which help protect the body from oxidative stress and inflammation. These antioxidants support overall health and may help reduce the risk of chronic diseases.
Serving Suggestions:
- As a Snack on the Go: These banana chips are portable and easy to take with you on the go. Pack them in a snack container or resealable bag for a crunchy treat wherever you are.
- In a Trail Mix: Add banana chips to your homemade trail mix for a naturally sweet, crunchy element. Combine with nuts, seeds, dried fruit, and a sprinkle of dark chocolate for a wholesome snack mix.
- With Dairy-Free Yogurt: Serve banana chips as a topping for dairy-free yogurt, drizzling a little honey or maple syrup on top for extra sweetness.
- As a Topping for Smoothie Bowls: Use banana chips as a crunchy topping for smoothie bowls, pairing them with other fresh fruits, granola, and seeds for a well-rounded, nutritious meal.
Why They’re Perfect for Any Time of Day: Banana chips are incredibly versatile and can be enjoyed at any time of day. They’re light enough for a morning snack, filling enough for an afternoon pick-me-up, and sweet enough to satisfy your cravings without turning to sugary, processed treats. Their portability makes them a great snack to have on hand when you’re on the go or need a quick energy boost.
Roasted Chickpeas
Introduction:
Roasted chickpeas are a crunchy, savory, and protein-packed snack that’s both gluten-free and dairy-free. They are an excellent alternative to traditional chips or crackers and can easily be made at home with just a few simple ingredients. These roasted legumes are not only delicious but also highly nutritious, providing a rich source of fiber, plant-based protein, and essential minerals. Whether you’re looking for a healthy snack to munch on during the day, a savory topping for salads, or a fun addition to your party snack table, roasted chickpeas are incredibly versatile and easy to prepare. Plus, they can be flavored in so many ways, from spicy to smoky to herby, making them the perfect snack for any craving.
Ingredients:
- 1 can (15 oz) chickpeas, drained and rinsed (or 1 1/2 cups dried chickpeas, cooked)
- 1 tablespoon olive oil
- 1 teaspoon ground cumin
- 1 teaspoon paprika (smoked paprika for a smoky flavor)
- 1/2 teaspoon garlic powder
- Salt and pepper to taste
- Optional: 1/4 teaspoon cayenne pepper or chili powder for heat
- Fresh parsley for garnish (optional)
Instructions:
- Prepare the Chickpeas: If using canned chickpeas, drain and rinse them well to remove any excess sodium and preservatives. If you’re using dried chickpeas, cook them according to package instructions until tender. For best results, pat the chickpeas dry with a towel or paper towels, removing as much moisture as possible. This step is crucial for getting a crispy texture when they roast.
- Season the Chickpeas: In a large mixing bowl, combine the dried chickpeas with olive oil, ground cumin, paprika, garlic powder, salt, and pepper. Add any optional seasonings you like, such as cayenne pepper for heat or a pinch of smoked paprika for a richer, smokier flavor. Toss everything together until the chickpeas are evenly coated with the oil and spices.
- Roast the Chickpeas: Preheat your oven to 400°F (200°C). Spread the seasoned chickpeas in a single layer on a baking sheet lined with parchment paper or a silicone baking mat. This will help prevent them from sticking to the sheet and make cleanup easier. Roast the chickpeas for 25-35 minutes, shaking the pan or stirring them every 10 minutes to ensure they cook evenly. The chickpeas should be golden brown and crispy by the end of the baking time. Be careful not to overcook them, as they can burn easily.
- Cool and Serve: Once the chickpeas are done roasting, remove them from the oven and let them cool for a few minutes. They will crisp up even more as they cool. If desired, garnish with fresh parsley for a burst of color and freshness. Serve the roasted chickpeas immediately or store them in an airtight container for up to a week.
Why You’ll Love These Roasted Chickpeas:
- Crunchy and Satisfying: Roasted chickpeas have an irresistible crunch that makes them a perfect alternative to chips, crackers, or other less healthy snack options. They’re hearty and filling, helping to satisfy your cravings while providing a nutritious boost.
- Packed with Protein and Fiber: Chickpeas are rich in plant-based protein and fiber, making them a filling and energizing snack. They help regulate blood sugar levels, promote digestive health, and keep you feeling full for longer.
- Customizable Flavors: The beauty of roasted chickpeas lies in their versatility. You can experiment with various spices and herbs to suit your taste. For a Mediterranean twist, use oregano, thyme, and lemon zest. For a spicier version, try a chili-lime seasoning. The possibilities are endless!
- Gluten-Free and Dairy-Free: These roasted chickpeas are naturally free from gluten and dairy, making them suitable for anyone with dietary restrictions. They’re also vegan, making them a great option for plant-based diets.
Health Benefits:
- Rich in Protein: Chickpeas are an excellent source of plant-based protein, which is essential for building and repairing muscle tissue, as well as supporting immune function. A cup of roasted chickpeas can provide a significant portion of your daily protein needs.
- High in Fiber: The fiber in chickpeas helps improve digestion, regulate blood sugar levels, and promote a healthy gut microbiome. Fiber also contributes to satiety, helping to reduce hunger between meals.
- Full of Essential Minerals: Chickpeas are a good source of iron, magnesium, and potassium, all of which are important for overall health. Iron supports healthy blood circulation, magnesium helps with muscle function and relaxation, and potassium aids in maintaining healthy blood pressure levels.
- Antioxidant-Rich: The spices used to season roasted chickpeas, such as cumin, paprika, and garlic, contain antioxidants that help combat oxidative stress in the body. Antioxidants play a key role in protecting cells from damage caused by free radicals and may reduce the risk of chronic diseases.
Serving Suggestions:
- As a Snack: Roasted chickpeas are perfect for a quick snack when you’re craving something crunchy. They’re easy to take with you on the go, making them a great addition to your lunchbox, gym bag, or travel snacks.
- As a Salad Topping: Use roasted chickpeas as a topping for salads or grain bowls to add texture and flavor. They pair wonderfully with leafy greens, quinoa, or rice and can elevate any salad with their crunch and savory seasoning.
- In a Trail Mix: Add roasted chickpeas to your homemade trail mix along with nuts, seeds, and dried fruit for a well-rounded, nutrient-packed snack. They add a savory element that balances out the sweetness of dried fruit and the richness of nuts.
- As a Party Snack: Serve roasted chickpeas as an appetizer or snack at parties. They’re a healthier option than traditional chips and can be served in small bowls for guests to enjoy.
Why They’re Perfect for Any Time of Day: Roasted chickpeas are an excellent snack option for any time of day. They make a great afternoon pick-me-up, a light snack before or after workouts, or even a satisfying addition to a lunch or dinner. Whether you’re at home, at work, or on the go, these roasted chickpeas are a crunchy, flavorful, and nutrient-packed snack that will keep you energized and full between meals.
Easy Gluten-Free and Dairy-Free Snack Recipes for Kids
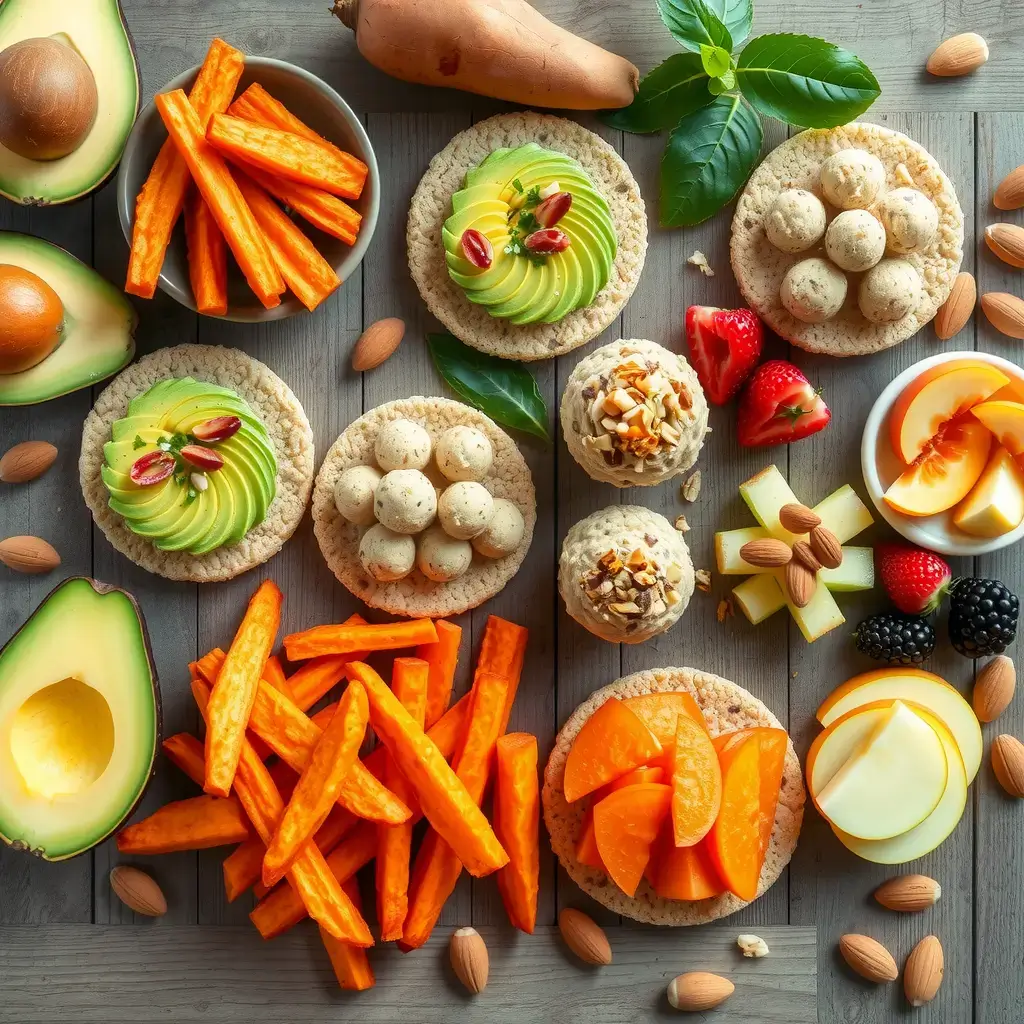
Mini Rice Cakes with Nut Butter
Introduction:
Mini rice cakes with nut butter are a delicious and satisfying snack that’s both gluten-free and dairy-free, making them perfect for a variety of dietary needs. Rice cakes are light and crunchy, providing the ideal base for creamy nut butter, which adds richness, protein, and healthy fats. This snack is not only easy to prepare, but it’s also incredibly versatile, allowing you to customize it with a variety of nut butters, toppings, and flavorings to suit your tastes. Whether you’re looking for a quick bite to curb your hunger, a post-workout snack, or a treat to satisfy your sweet tooth, mini rice cakes with nut butter are an excellent choice. They’re simple, nutritious, and can be enjoyed by people of all ages!
Ingredients:
- 6-8 mini rice cakes (make sure they are gluten-free)
- 2 tablespoons almond butter, peanut butter, or any nut butter of your choice (or sunflower seed butter for a nut-free option)
- 1 teaspoon honey or maple syrup (optional, for sweetness)
- Sliced banana or apple (optional, for topping)
- Chia seeds, hemp seeds, or flaxseeds (optional, for extra nutrition)
- Cinnamon, cocoa powder, or vanilla extract (optional, for added flavor)
Instructions:
- Prepare the Rice Cakes: Start by selecting your mini rice cakes. You can either purchase pre-made gluten-free rice cakes or make them yourself. Mini rice cakes are perfect for snacking because their small size makes them easy to handle and bite into. If you’re using store-bought rice cakes, check the ingredient label to ensure that they are gluten-free and made with whole grains for maximum nutrition.
- Spread the Nut Butter: Spoon about 1/2 to 1 tablespoon of your favorite nut butter (almond butter, peanut butter, cashew butter, or sunflower seed butter) onto each rice cake. Spread it evenly across the surface, making sure the nut butter covers the entire rice cake. You can adjust the amount of nut butter depending on how creamy and rich you want each bite to be.
- Add Optional Toppings: For extra flavor and nutrition, you can top the nut butter-covered rice cakes with various toppings. For a sweet touch, slice up a banana or apple and arrange the slices on top of the nut butter. The natural sweetness of the fruit pairs wonderfully with the creamy texture of the nut butter. You can also sprinkle some cinnamon or cocoa powder for an added depth of flavor or drizzle a little honey or maple syrup for extra sweetness. If you’re looking to add more fiber and healthy fats, sprinkle a few chia seeds, hemp seeds, or flaxseeds on top. These seeds not only add texture but also provide additional omega-3 fatty acids, protein, and fiber.
- Serve and Enjoy: Once you’ve added your toppings, the mini rice cakes with nut butter are ready to serve! Enjoy them immediately as a quick snack, or pack them for lunch, a post-workout snack, or a picnic. These rice cakes are also a great snack for kids, as they are easy to eat and can be made fun by varying the toppings.
Why You’ll Love These Mini Rice Cakes with Nut Butter:
- Quick and Easy: This snack takes only a few minutes to prepare, making it a perfect choice when you need something healthy but don’t have much time. It’s also very customizable, so you can create different flavor profiles based on your preferences.
- Packed with Nutrition: Rice cakes provide a light and crunchy base, while nut butter adds protein, healthy fats, and fiber, keeping you satisfied and energized. Bananas or apples add natural sweetness and vitamins, while seeds contribute additional fiber and omega-3 fatty acids, making this snack a balanced, nutrient-rich option.
- Gluten-Free and Dairy-Free: This snack is naturally gluten-free and dairy-free, making it ideal for anyone with dietary restrictions or food sensitivities. It’s also suitable for vegan diets, provided you choose a plant-based nut butter.
- Versatile and Customizable: The beauty of mini rice cakes with nut butter is how easily you can customize them to suit your tastes. Switch up the nut butters, fruits, and seasonings to create new flavor combinations. Whether you prefer sweet or savory, there’s a combination for everyone.
Health Benefits:
- Rich in Healthy Fats: Nut butters, such as almond and peanut butter, are rich in monounsaturated fats, which support heart health by helping to reduce cholesterol levels and inflammation. These fats also provide long-lasting energy.
- High in Protein: Nut butters are a good source of plant-based protein, which is essential for muscle repair and growth, making this snack ideal for those who are active or need a protein boost.
- Full of Fiber: Rice cakes, nuts, and seeds are all rich in dietary fiber, which promotes digestive health, helps control blood sugar levels, and keeps you feeling full longer.
- Rich in Vitamins and Minerals: Bananas and apples provide important vitamins, such as vitamin C and potassium, which support immune health, hydration, and muscle function.
Serving Suggestions:
- As a Breakfast Option: Enjoy mini rice cakes with nut butter for a quick and healthy breakfast. Pair them with a dairy-free smoothie or a cup of herbal tea for a balanced start to your day.
- As an Afternoon Snack: Mini rice cakes with nut butter make the perfect snack to carry you through the afternoon slump. They provide a satisfying mix of energy-boosting carbohydrates, protein, and healthy fats to keep you going.
- For Kids: These mini rice cakes are a great snack for children. You can make them fun by letting kids pick their own toppings and assembling them themselves. They’ll love the crunchy texture, and you’ll love how nutritious the snack is.
- For a Light Meal: These rice cakes can also serve as a light meal, paired with a side salad or a cup of soup for a balanced and satisfying lunch.
Why They’re Perfect for Any Time of Day: Mini rice cakes with nut butter are versatile enough to be enjoyed at any time of day. Whether you need a quick snack in the morning, a midday energy boost, or a light treat before bed, this snack provides the right balance of nutrition to keep you satisfied and energized. It’s easy to prepare, customizable to your taste, and can be made with whatever ingredients you have on hand, making it a convenient choice for busy days.
Gluten-Free Crackers with Guacamole
Introduction:
Gluten-free crackers with guacamole are a simple yet incredibly delicious snack that’s both satisfying and nutritious. This combination brings together the crispiness of gluten-free crackers with the creamy, flavorful goodness of fresh guacamole, creating the perfect balance of texture and taste. Whether you’re craving something savory, looking for a healthy snack to enjoy with friends, or preparing a party platter, this snack is a crowd-pleaser that suits a variety of dietary needs. Not only is it naturally gluten-free and dairy-free, but it’s also rich in healthy fats, fiber, and vitamins, making it a nourishing treat that you can enjoy any time of day.
Ingredients:
- 1 box of gluten-free crackers (store-bought or homemade)
- 2 ripe avocados
- 1 small lime (for juice)
- 1/4 cup red onion, finely chopped
- 1 small tomato, diced (optional)
- 1/2 teaspoon garlic powder
- 1 tablespoon fresh cilantro, chopped (optional)
- Salt and pepper, to taste
- A pinch of cayenne pepper (optional, for some heat)
Instructions:
- Prepare the Guacamole: Start by cutting the avocados in half and removing the pit. Scoop the flesh into a medium-sized bowl and mash it with a fork or potato masher until it reaches your desired consistency. Some people prefer their guacamole smooth, while others like it chunky. It’s up to you!
- Add Flavorings: Squeeze the juice of a lime into the mashed avocado to brighten the flavor and help prevent browning. Add the finely chopped red onion, tomato (if using), garlic powder, and fresh cilantro (if desired). Season with salt and pepper to taste. For a little extra heat, sprinkle in some cayenne pepper or a few drops of hot sauce. Mix everything together until it’s well combined, and taste it to ensure the flavors are balanced.
- Serve with Crackers: Once the guacamole is ready, scoop a generous amount onto each gluten-free cracker. For a fun twist, serve the guacamole in a small bowl alongside the crackers, allowing guests to dip the crackers into the creamy guacamole. This method gives people the freedom to control how much guacamole they want on their crackers.
- Optional Garnishes: If you want to elevate the dish, consider garnishing the guacamole with extra cilantro, a sprinkle of chili flakes, or a few slices of jalapeño for a spicy kick. This adds color and a burst of flavor to the guacamole.
- Enjoy: Serve immediately and enjoy this fresh, vibrant snack! It’s perfect for snacking on the go, at parties, or as a light appetizer before a meal.
Why You’ll Love This Snack:
- Quick and Easy: This snack is incredibly simple to prepare and can be ready in just 10 minutes. The guacamole comes together in a snap, and the gluten-free crackers provide a perfect, crunchy base without any hassle.
- Naturally Gluten-Free and Dairy-Free: Both the guacamole and the gluten-free crackers are naturally free from gluten and dairy, making this a great choice for anyone following a gluten-free or dairy-free diet. It’s also suitable for vegans, as long as the crackers are free from animal-derived ingredients.
- Healthy and Nutritious: Avocados are packed with healthy monounsaturated fats, which are great for heart health and help keep you feeling full longer. They’re also loaded with potassium, fiber, and antioxidants. When paired with gluten-free crackers, which are often made from whole grains and seeds, you get a balanced snack that’s rich in nutrients.
- Customizable: You can easily adjust the flavor of the guacamole to suit your tastes. If you prefer a spicier version, add more chili or jalapeños. For a creamy variation, you can mix in some plain dairy-free yogurt or a dollop of tahini. Add other vegetables like corn, bell peppers, or even mango for a twist on the classic recipe.
Health Benefits:
- Rich in Healthy Fats: The star ingredient, avocado, is a powerhouse of healthy fats, particularly monounsaturated fats, which can help reduce bad cholesterol levels and support overall cardiovascular health.
- Packed with Fiber: Both avocados and gluten-free crackers are good sources of fiber, which promotes digestive health, supports healthy blood sugar levels, and keeps you feeling full and satisfied.
- High in Antioxidants: Avocados are rich in antioxidants, including vitamin E and vitamin C, which help combat oxidative stress and support immune function. The tomatoes and cilantro in the guacamole also provide additional antioxidants to protect your body from inflammation and damage.
- Good for Skin Health: The healthy fats in avocado, combined with its vitamin E content, help keep skin moisturized and glowing. Regular consumption of avocados can contribute to smoother, healthier skin.
Serving Suggestions:
- For a Party or Gathering: This snack is perfect for serving at parties or social gatherings. Arrange the gluten-free crackers on a platter with a small bowl of guacamole in the center for easy dipping. You can even make a larger batch of guacamole and serve it with an assortment of gluten-free snacks like veggies, chips, and rice cakes.
- As a Light Lunch or Appetizer: Gluten-free crackers with guacamole make for a quick and satisfying lunch when paired with a salad or some fresh fruit. They’re also great as a light appetizer before a main meal.
- With Other Dips: For a more substantial snack, you can serve guacamole with a variety of other gluten-free dips like salsa, hummus, or roasted red pepper dip. This way, you have a whole spread of delicious, healthy options to enjoy.
Why They’re Perfect for Any Time of Day: Gluten-free crackers with guacamole are a versatile snack that can be enjoyed any time of day. They’re light enough to be a midday snack but hearty enough to serve as a small meal when paired with other ingredients. Whether you’re packing them for lunch, serving them as an appetizer at a dinner party, or enjoying them as a snack at home, they are a simple and satisfying option for any occasion.
Cucumber and Hummus Cups
Introduction:
Cucumber and hummus cups are an incredibly refreshing and healthy snack that’s both gluten-free and dairy-free. These little bite-sized cups are made from fresh cucumber slices hollowed out and filled with creamy hummus. The crispness of the cucumber provides a perfect contrast to the rich, savory hummus, making this snack both satisfying and hydrating. It’s a fantastic option for anyone looking for a light, nutritious snack that’s quick to prepare, easy to customize, and full of flavor. Whether you’re hosting a party, preparing an appetizer, or just need a healthy snack during the day, cucumber and hummus cups offer a delicious, no-fuss option that everyone will love.
Ingredients:
- 2 large cucumbers (preferably English cucumbers)
- 1 cup homemade or store-bought hummus (plain, garlic, or flavored)
- 1 tablespoon fresh parsley or cilantro, chopped (optional, for garnish)
- 1/2 teaspoon paprika (optional, for garnish)
- A squeeze of fresh lemon juice (optional, for added zest)
- Olive oil drizzle (optional, for richness)
Instructions:
- Prepare the Cucumbers: Start by washing the cucumbers thoroughly. If you’re using a standard cucumber, peel it to remove the tough skin (English cucumbers tend to have a thinner skin, so they can be left unpeeled). Cut the cucumbers into thick slices, about 1/2 to 3/4 inch thick. Then, using a small melon baller, spoon, or knife, hollow out the center of each cucumber slice, leaving a sturdy base. Be careful not to cut through the bottom of the cucumber slice, as you want to create a little “cup” to hold the hummus.
- Fill with Hummus: Once the cucumber cups are prepared, spoon a generous amount of hummus into each cup. You can use plain hummus or choose from flavored varieties like roasted red pepper, garlic, or lemon for added variety. If you want a more decorative presentation, you can pipe the hummus into the cups using a piping bag fitted with a decorative tip.
- Optional Garnishes: For an added touch of flavor and visual appeal, garnish the filled cucumber cups with a sprinkle of paprika, a drizzle of olive oil, or a squeeze of fresh lemon juice. You can also sprinkle some freshly chopped parsley or cilantro on top for a burst of color and freshness. These small garnishes elevate the flavor profile and make the dish look more inviting.
- Serve and Enjoy: Arrange the cucumber and hummus cups on a serving platter and serve immediately. They are best enjoyed fresh to maintain the crunchiness of the cucumber and the creaminess of the hummus. If making ahead, you can store the cups in the refrigerator for up to a couple of hours, but it’s best to assemble them just before serving to avoid soggy cucumbers.
Why You’ll Love These Cucumber and Hummus Cups:
- Quick and Easy: This snack is incredibly simple to make and requires minimal preparation. In just 10-15 minutes, you can have a refreshing and healthy snack ready to serve.
- Naturally Gluten-Free and Dairy-Free: Cucumber and hummus cups are naturally gluten-free and dairy-free, making them an excellent choice for anyone with dietary restrictions or sensitivities. They’re also suitable for vegans and vegetarians.
- Hydrating and Refreshing: Cucumbers are made up of over 90% water, making them one of the most hydrating vegetables you can eat. Paired with the creamy texture of hummus, this snack is both refreshing and filling, providing a nice balance of hydration and sustenance.
- Low in Calories: This snack is low in calories, making it a great option for anyone looking for a healthy, light snack that won’t weigh them down. Despite being low-calorie, it’s packed with nutrients, so you’ll feel satisfied after eating.
- Customizable: Just like hummus itself, cucumber cups can be customized to suit your tastes. You can choose your favorite hummus flavor, add a variety of toppings, or even serve the cups with different types of veggies, such as bell pepper slices or carrot sticks, for added variety.
Health Benefits:
- Rich in Antioxidants: Cucumbers are high in antioxidants, such as beta-carotene, flavonoids, and tannins, which help protect the body against free radical damage. These antioxidants are beneficial for overall health, including skin health.
- Packed with Fiber: Hummus, made from chickpeas and tahini, is a great source of fiber, which supports digestive health and keeps you feeling fuller longer. The fiber in cucumbers also helps promote healthy digestion and regulate blood sugar levels.
- Heart-Healthy Fats: Hummus contains heart-healthy fats from olive oil and tahini, which are beneficial for reducing bad cholesterol and supporting cardiovascular health. These fats are also great for brain health and reducing inflammation.
- Rich in Vitamins and Minerals: Cucumbers are a good source of vitamin K, which is essential for bone health and blood clotting. They also provide a good amount of potassium, which supports healthy blood pressure levels. Hummus is rich in iron and folate, both important for energy production and maintaining healthy red blood cells.
Serving Suggestions:
- As a Party Appetizer: These cucumber and hummus cups are perfect for serving at parties, picnics, or gatherings. Arrange them on a platter with other gluten-free appetizers like veggie sticks, olives, or gluten-free crackers to create a visually appealing snack spread.
- As a Light Snack or Side: Serve these cups as a light snack in between meals or as a healthy side dish to a larger meal. They pair well with a protein-packed main dish like grilled chicken, tofu, or quinoa salad.
- For Kids: These cucumber cups make a fun and healthy snack for kids. The individual portions are easy for little hands to grab, and the creamy hummus will appeal to their taste buds. Let kids help assemble their own cups for a fun activity!
Why They’re Perfect for Any Time of Day: Cucumber and hummus cups are a versatile snack that can be enjoyed any time of day. They’re perfect as a mid-morning or afternoon snack, a light lunch, or even as an appetizer for a dinner party. The refreshing crunch of the cucumber and the creamy richness of the hummus make it a satisfying and nutritious choice for any occasion. Whether you’re looking for a quick snack at home or something to serve at your next gathering, these cups are a great option that’s healthy, delicious, and easy to make.
Quick Snacks to Take on the Go
Trail Mix with Nuts and Dried Fruit
Introduction:
Trail mix with nuts and dried fruit is a classic, portable snack that’s not only quick to prepare but also incredibly customizable. Packed with protein, healthy fats, fiber, and natural sugars, this snack is perfect for when you need an energy boost during a busy day. Whether you’re heading out for a hike, looking for a nutritious snack to fuel you through the afternoon, or preparing something to pack in your lunch or take on-the-go, trail mix with nuts and dried fruit is the ultimate versatile and satisfying choice. It’s an excellent source of nutrients and can be tailored to suit your tastes, dietary preferences, and cravings.
What makes trail mix so great is its flexibility. It’s not just a one-size-fits-all snack – you can mix and match ingredients to create a blend that’s perfectly suited to your liking, whether you prefer a sweet or salty combination, or even something with a bit of spice. Plus, it’s easy to make in bulk and store for whenever you need a quick, filling snack.
Ingredients:
- 1 cup almonds (or any nuts of your choice, such as cashews, walnuts, or pecans)
- 1/2 cup dried cranberries (or raisins, apricots, or any dried fruit)
- 1/4 cup sunflower seeds (or pumpkin seeds for added crunch)
- 1/4 cup dark chocolate chips or cocoa nibs (optional, for a sweet touch)
- 1/4 cup coconut flakes (optional, for tropical flavor)
- 1 tablespoon chia seeds or flaxseeds (optional, for extra fiber)
- A pinch of sea salt (optional, to balance the sweetness)
- 1/4 teaspoon cinnamon (optional, for flavor)
Instructions:
- Prepare the Ingredients: Start by measuring out your nuts, dried fruit, seeds, and other optional ingredients. If using whole nuts, you may want to give them a rough chop to make the pieces more bite-sized. You can also lightly toast the nuts in a dry pan over medium heat for 5-7 minutes to enhance their flavor and provide extra crunch (but be sure not to burn them). Allow them to cool before mixing them with the other ingredients.
- Combine the Ingredients: In a large mixing bowl, combine the almonds, dried cranberries, sunflower seeds, coconut flakes, chia or flaxseeds, and any other ingredients you’ve chosen to include. Toss everything together to ensure an even distribution of each ingredient throughout the mix.
- Add Optional Seasonings: If you want to enhance the flavor, you can add a pinch of sea salt to balance out the sweetness of the dried fruit and chocolate. Cinnamon can also be sprinkled into the mix for a warm, comforting touch. Toss again to incorporate the seasonings.
- Store and Serve: Once the trail mix is well-mixed, transfer it to an airtight container or resealable bag for storage. This trail mix can be kept at room temperature for up to a week, making it easy to keep on hand as a ready-to-eat snack. You can also store it in smaller snack-sized bags for easy grab-and-go servings.
- Enjoy: Enjoy your trail mix by itself, or pair it with other healthy snacks for a balanced snack platter. You can also use it as a topping for oatmeal, yogurt, or smoothie bowls to add some texture and crunch.
Why You’ll Love This Trail Mix:
- Quick and Easy: Trail mix is a no-cook snack that comes together in just a few minutes, making it an ideal choice for busy days when you need something fast and nutritious. It’s perfect for meal prep, allowing you to make a large batch that will last for several days.
- Customizable: The best part about trail mix is how easily it can be customized. You can switch up the nuts, dried fruits, and other add-ins based on your preferences. If you prefer a sweeter mix, add more dried fruit or a handful of chocolate chips. For a savory option, try adding roasted chickpeas, pretzels, or a dash of smoked paprika.
- Packed with Nutrients: Nuts are rich in healthy fats, protein, and fiber, helping to keep you full and satisfied. Dried fruit adds natural sweetness, as well as a boost of vitamins and antioxidants. Seeds like sunflower and flax are great sources of omega-3 fatty acids and additional fiber, making this snack not only tasty but nourishing.
- Perfect for On-the-Go: Trail mix is incredibly portable, making it the perfect snack to take with you when you’re out and about. Whether you’re hiking, traveling, or simply need a snack between meals, trail mix offers a convenient, mess-free option that can be easily packed in a bag or lunchbox.
Health Benefits:
- Rich in Healthy Fats: The nuts and seeds in trail mix are high in monounsaturated and polyunsaturated fats, which help reduce bad cholesterol and improve heart health. These healthy fats also support brain function and reduce inflammation in the body.
- Packed with Fiber: Both nuts and dried fruit are excellent sources of fiber, which supports digestive health and helps regulate blood sugar levels. Fiber also contributes to feeling full for longer periods, making trail mix an excellent snack to curb hunger between meals.
- Antioxidant-Rich: Dried fruits, particularly cranberries and apricots, are loaded with antioxidants, which protect the body against oxidative stress and promote healthy aging. Dark chocolate also contains antioxidants that support heart health.
- Good for Skin and Hair: The healthy fats in nuts and seeds, combined with the vitamins and minerals in dried fruit, support skin hydration and promote shiny, healthy hair. Omega-3s and vitamin E are particularly beneficial for maintaining a glowing complexion.
Serving Suggestions:
- As a Snack: Trail mix is great on its own as a quick snack when you’re hungry. Its combination of protein, healthy fats, and carbs makes it a well-rounded option for a pick-me-up during the day.
- Post-Workout Snack: The mix of protein and carbohydrates in trail mix makes it an ideal snack for recovery after a workout. Pair it with a glass of water or coconut water to replenish your electrolytes.
- In Smoothie Bowls or Yogurt: Add a handful of trail mix as a crunchy topping for smoothie bowls, oatmeal, or dairy-free yogurt. It provides an added texture contrast to creamy base layers, making it even more satisfying.
- For Kids: Trail mix is a fun and healthy snack for kids. You can prepare small snack-sized bags for them to take to school or for after-school snacks. They’ll love the sweetness of the dried fruit and chocolate, while you’ll appreciate the healthy ingredients.
Why It’s Perfect for Any Time of Day: Trail mix with nuts and dried fruit is perfect for any time of day. Whether you need an energy boost in the morning, a quick snack at work, or a satisfying post-dinner treat, trail mix offers a convenient, wholesome option. Its portability and versatility make it an ideal snack for busy people, and its customizable nature means it can suit any taste preference or dietary need.
Energy Bites with Oats and Peanut Butter
Introduction:
Energy bites with oats and peanut butter are the perfect combination of simplicity, taste, and nutrition. These bite-sized snacks are packed with fiber, protein, and healthy fats, making them the ideal choice for a quick breakfast, post-workout snack, or an afternoon pick-me-up. The creamy richness of peanut butter pairs wonderfully with the chewy texture of oats, creating a snack that is both filling and energizing. Energy bites are also incredibly versatile and can be customized with a variety of add-ins to suit your flavor preferences, from chocolate chips to dried fruit, seeds, or even a hint of cinnamon. Whether you’re on-the-go, prepping for a busy week, or just craving a healthy snack, these oat and peanut butter energy bites are easy to make and full of wholesome ingredients.
Ingredients:
- 1 cup rolled oats (make sure they are gluten-free if needed)
- 1/2 cup peanut butter (or almond butter for a different flavor)
- 1/4 cup honey or maple syrup (for a vegan option)
- 1/4 cup ground flaxseeds or chia seeds (for added fiber and omega-3s)
- 1/4 cup chocolate chips or cocoa nibs (optional, for sweetness)
- 1/2 teaspoon vanilla extract
- A pinch of sea salt
- Optional: 1/4 cup dried fruit (raisins, cranberries, apricots, or chopped dates)
- Optional: 1/4 cup coconut flakes for added texture
Instructions:
- Combine the Wet Ingredients: In a medium bowl, combine the peanut butter, honey (or maple syrup), and vanilla extract. Stir until everything is well combined and the peanut butter is smooth and creamy. If you’re using a natural peanut butter that’s a bit more runny, this will help give the energy bites a better consistency.
- Add the Dry Ingredients: To the peanut butter mixture, add the rolled oats, ground flaxseeds (or chia seeds), and any optional ingredients such as dried fruit, coconut flakes, or chocolate chips. Mix thoroughly to ensure all the ingredients are evenly distributed. The oats provide the base for the energy bites, while the flaxseeds or chia seeds add a boost of fiber and omega-3 fatty acids. The optional dried fruit adds sweetness, and the chocolate chips give the bites an extra indulgent touch.
- Form the Energy Bites: Once the mixture is fully combined, use your hands or a spoon to scoop out about 1 tablespoon of the mixture at a time. Roll each portion into a ball, pressing the mixture firmly together so the energy bites hold their shape. If the mixture feels too sticky, you can lightly wet your hands with water to make rolling easier. If it’s too dry, add a little more peanut butter or a splash of water to adjust the consistency.
- Chill and Set: Place the energy bites on a tray or plate lined with parchment paper and refrigerate for at least 30 minutes. Chilling the bites helps them set and firm up, making them easier to eat and store. If you’re in a rush, you can place them in the freezer for about 10-15 minutes to speed up the process.
- Store and Enjoy: Once the energy bites are firm, they are ready to enjoy! Store them in an airtight container in the refrigerator for up to a week, or keep them in the freezer for longer shelf life. These bites are portable and convenient, making them the perfect snack for busy days or post-workout refueling.
Why You’ll Love These Energy Bites:
- Quick and Easy to Make: These energy bites come together in under 10 minutes with just a few simple ingredients. There’s no baking involved, so they’re perfect for when you need a healthy snack in a hurry.
- Packed with Protein and Fiber: The peanut butter provides a good source of plant-based protein, while the oats and flaxseeds add fiber, helping to keep you full and satisfied between meals. The protein in these bites is especially helpful after a workout to aid muscle recovery.
- Naturally Sweetened: These energy bites are sweetened with honey or maple syrup, both natural sweeteners that are lower in refined sugar compared to traditional candy or snack bars. You can adjust the sweetness to your preference, depending on your taste.
- Customizable: The recipe is highly customizable! Add-ins like dried fruit, seeds, coconut flakes, or chocolate chips let you tailor the flavor and texture to your liking. You can also switch out the peanut butter for other nut butters (such as almond butter, cashew butter, or sunflower seed butter) to suit your dietary needs or flavor preferences.
- Portable and Convenient: These energy bites are easy to take on the go. They fit perfectly into snack bags or lunchboxes, making them ideal for quick refueling during busy days, travel, or after workouts.
Health Benefits:
- Rich in Healthy Fats: Peanut butter, and other nut butters, provide healthy fats that are important for heart health, brain function, and keeping you feeling full for longer. These fats also support healthy cholesterol levels and promote fat-soluble vitamin absorption.
- High in Fiber: Oats, flaxseeds, and chia seeds are rich in fiber, which supports digestive health, helps regulate blood sugar levels, and promotes satiety. A fiber-rich snack helps prevent the energy crashes associated with sugary snacks.
- Supports Muscle Recovery: The protein in peanut butter and the fiber from oats make these energy bites an excellent post-workout snack, supporting muscle repair and replenishing energy stores after exercise.
- Packed with Omega-3 Fatty Acids: Flaxseeds and chia seeds are great plant-based sources of omega-3 fatty acids, which help reduce inflammation and support brain health and heart function.
Serving Suggestions:
- As a Quick Breakfast: These energy bites make a great quick breakfast when you’re running late. Pair them with a dairy-free yogurt or a smoothie for a balanced meal on-the-go.
- Pre- or Post-Workout Snack: Enjoy these bites before or after your workout to give you sustained energy and promote recovery. They are an excellent source of protein, carbs, and healthy fats to fuel your muscles and keep you energized.
- For Busy Days: When you need a snack to tide you over during busy afternoons, these energy bites are a perfect option. They are filling, nutritious, and easy to carry with you to work, school, or while traveling.
- For Kids: These energy bites are a hit with children, too! They can be made into smaller, kid-sized portions and are a great alternative to sugary snacks or packaged granola bars.
Why They’re Perfect for Any Time of Day: Energy bites with oats and peanut butter are incredibly versatile and can be enjoyed at any time of the day. Whether you’re looking for a quick breakfast, a satisfying snack, or a post-workout refuel, these energy bites provide a perfect balance of protein, healthy fats, and fiber. They’re portable, easy to store, and made with wholesome ingredients, making them the perfect snack for busy, active lifestyles.
Rice Cakes with Guacamole and Veggies
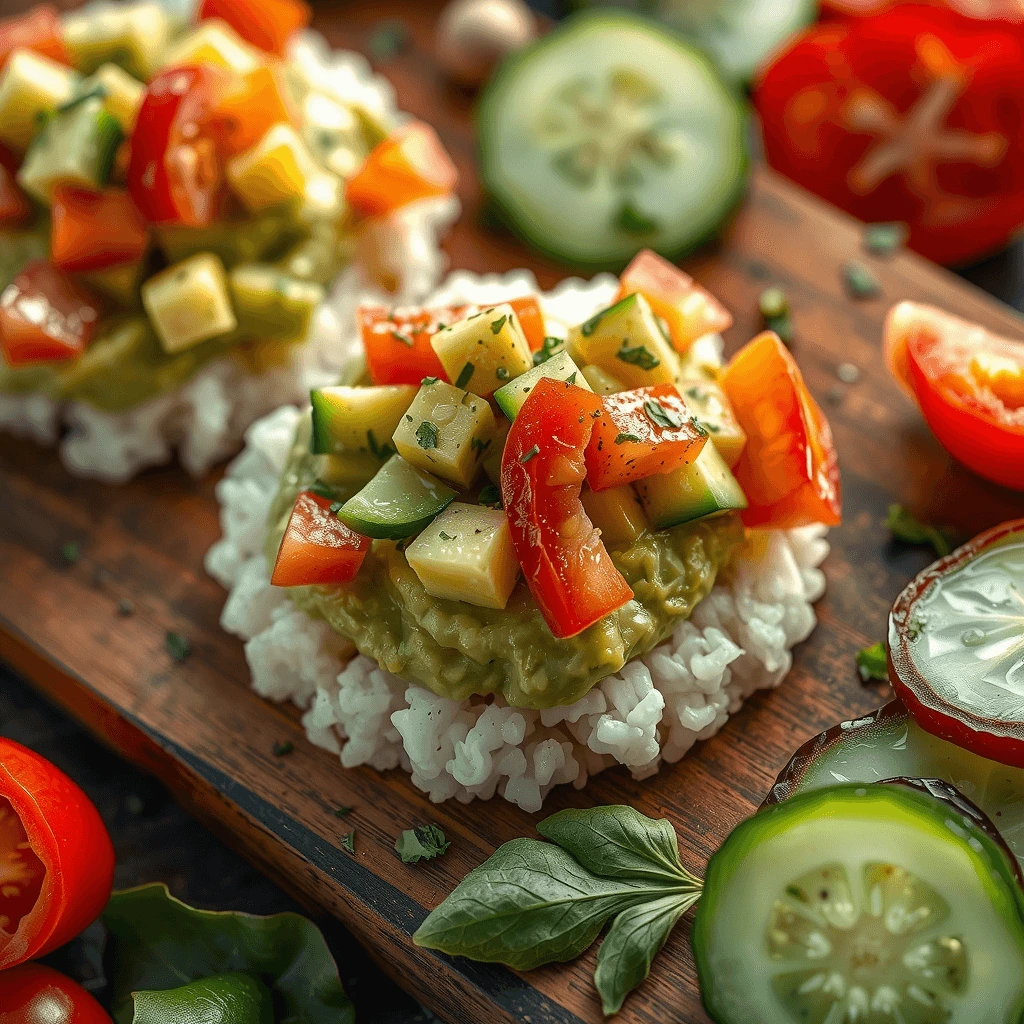
Introduction:
Rice cakes with guacamole and veggies make for a light, nutritious, and satisfying snack that’s both gluten-free and dairy-free. This simple yet flavorful dish combines the crisp, airy texture of rice cakes with the creamy, rich taste of homemade guacamole and the crunch of fresh vegetables. The result is a perfect balance of texture and flavor—crunchy, creamy, tangy, and savory all in one bite. Whether you’re looking for a quick snack, a light meal, or an appetizer for a gathering, rice cakes with guacamole and veggies are a versatile and easy-to-make choice. This recipe is not only delicious but also packed with healthy fats, fiber, and essential vitamins, making it a nourishing snack for any time of day.
Ingredients:
- 4 gluten-free rice cakes (preferably whole grain for added nutrition)
- 2 ripe avocados
- 1 tablespoon lime juice (or lemon juice)
- 1 small red onion, finely chopped
- 1 small tomato, diced
- 1/4 teaspoon garlic powder
- Salt and pepper, to taste
- 1/2 cup sliced cucumber (optional, for crunch)
- 1/4 cup shredded carrots (optional, for color and sweetness)
- Fresh cilantro, chopped (optional, for garnish)
- A pinch of cayenne pepper or chili flakes (optional, for a spicy kick)
- Olive oil drizzle (optional, for extra richness)
Instructions:
- Prepare the Guacamole: Begin by cutting the avocados in half and removing the pits. Scoop the flesh into a bowl and mash it with a fork until it reaches your desired consistency—smooth or slightly chunky, depending on your preference. Add the lime juice to prevent the guacamole from browning and to give it a fresh, zesty flavor. Stir in the finely chopped red onion, diced tomato, garlic powder, salt, and pepper. For a little extra heat, add a pinch of cayenne pepper or chili flakes. Mix until all ingredients are well combined, and adjust the seasoning as needed.
- Prepare the Veggies: Slice the cucumber into thin rounds or sticks, depending on your preference. Grate or finely shred the carrots for added texture and a pop of color. These vegetables not only add crunch and freshness but also provide additional nutrients to the snack, such as vitamin C, beta-carotene, and fiber.
- Assemble the Rice Cakes: Place the rice cakes on a plate or serving platter. Spread a generous amount of guacamole onto each rice cake, ensuring it covers the entire surface for a creamy base. The guacamole will serve as a flavorful topping and bind the veggies to the rice cake.
- Top with Veggies: Once the guacamole is spread evenly, top each rice cake with the sliced cucumber, shredded carrots, and any other fresh veggies you’d like to add. The cucumber adds a cool, crunchy texture, while the carrots provide a mild sweetness that complements the savory guacamole. You can also get creative by adding bell pepper strips, cherry tomato halves, or a sprinkle of sprouts or microgreens for extra flavor and nutrition.
- Optional Garnishes: For an added touch of flavor, drizzle a little olive oil over the veggies or garnish with fresh cilantro. The cilantro will provide a fresh, herbal note that brightens up the entire dish. You can also sprinkle a little sea salt or fresh ground black pepper to taste.
- Serve and Enjoy: Serve the rice cakes with guacamole and veggies immediately. This dish is best enjoyed fresh to maintain the crispness of the rice cakes and the vibrant flavors of the guacamole and veggies. It makes for a refreshing snack or light meal, and it’s easy to assemble in minutes.
Why You’ll Love This Snack:
- Quick and Easy: Rice cakes with guacamole and veggies come together in just 10 minutes, making them a perfect snack when you’re short on time. The guacamole can be prepped ahead of time, and the assembly of the rice cakes is a breeze.
- Customizable: This recipe is incredibly versatile. You can switch up the veggies based on what’s in season or what you have on hand. Try adding sliced radishes, avocado slices, or even a sprinkle of roasted seeds for added crunch and flavor. You can also vary the guacamole with different spices, such as cumin or smoked paprika, or by adding roasted red peppers for extra depth.
- Gluten-Free and Dairy-Free: This snack is naturally gluten-free and dairy-free, making it a great option for those with dietary restrictions. It’s also suitable for vegans, providing a wholesome and plant-based snack or meal option.
- Packed with Nutrients: The combination of healthy fats from the avocado, fiber from the rice cakes and vegetables, and protein from the avocado and optional toppings makes this snack not only delicious but also filling. It provides a balance of macronutrients to keep you energized and satisfied.
- Refreshing and Light: Rice cakes with guacamole and veggies are light yet satisfying. The crispness of the rice cakes and the freshness of the veggies make this snack feel refreshing, especially on warm days or when you’re looking for something lighter.
Health Benefits:
- Rich in Healthy Fats: Avocados are a fantastic source of monounsaturated fats, which are heart-healthy and help reduce inflammation in the body. These healthy fats also promote brain function and keep you feeling full longer.
- High in Fiber: Both the rice cakes and vegetables provide fiber, which is essential for good digestive health. Fiber also helps regulate blood sugar levels and supports cardiovascular health. The fiber in this snack makes it a filling option that can curb your hunger between meals.
- Packed with Vitamins and Antioxidants: The veggies, especially cucumbers and carrots, provide essential vitamins like vitamin C, vitamin K, and beta-carotene, which help boost immune health, support skin health, and protect against oxidative stress.
- Low in Calories: This snack is light but nutrient-dense, making it a great option if you’re looking to enjoy something low in calories but still satisfying. The healthy fats from the avocado, combined with the crunch from the rice cakes and fresh veggies, make for a balanced snack.
Serving Suggestions:
- For a Party or Gathering: Rice cakes with guacamole and veggies make an excellent appetizer or party snack. Arrange them on a platter for guests to enjoy. You can also create a variety of rice cakes with different toppings to offer a range of flavors.
- As a Light Meal: Pair these rice cakes with a side salad or a small bowl of soup for a light lunch or dinner. The combination of rice cakes, guacamole, and veggies provides a balance of healthy fats, fiber, and protein.
- For Kids: These rice cakes are a fun and healthy snack for children. Let kids help assemble their own rice cakes with guacamole and veggies for a fun, interactive snack time. You can even make it more fun by using small cookie cutters to shape the rice cakes into different forms.
Why They’re Perfect for Any Time of Day: Rice cakes with guacamole and veggies are a versatile snack that can be enjoyed at any time of day. Whether you’re looking for a quick breakfast, a healthy snack, or a light lunch or dinner, this dish provides a balance of fresh, satisfying flavors. It’s a quick, nourishing snack that’s both filling and hydrating, making it perfect for busy days when you need a healthy, energizing snack.
Gluten-free and dairy-free snacks offer incredible versatility, making it easy to find something satisfying, whether you’re looking for a quick bite, a nourishing meal, or something to curb your cravings. From crunchy vegetable bites and crispy sweet potato fries to creamy guacamole with rice cakes, the options are endless. The beauty of these snack ideas is that they can be easily customized to fit your personal preferences, dietary restrictions, and taste buds.
Experiment with these snack recipes and feel free to add your own twist. Whether you want to spice things up, add new flavors, or swap ingredients based on what you have at home, these gluten-free and dairy-free snacks are as flexible as they are delicious. The possibilities are endless—let your creativity guide you to your perfect snack!
We encourage you to try these recipes, share them with friends and family, and discover your own favorite combinations. And don’t forget to share your creations and any new snack ideas you come up with—we’d love to hear what works best for you! Enjoy these healthy, flavorful snacks and keep exploring new ways to treat yourself without compromising on taste or health.